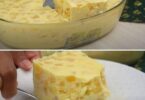
7- Burnt Basque cheesecake
This is so low-fuss, it’s unbelievable – perfect for anyone who is short on time and needs to make something quick (preferably for the next day). It’s a caramelised cheesecake, baked high and fast, that can be eaten warm or served cold straight from the fridge.

Ingredients
650g full-fat soft cheese, at room temperature
300g caster sugar
5 eggs
150g soured cream
230g double cream
35g cornflour
1⁄2 tsp sea salt flakes
Method
STEP 1
Heat the oven to 220C/fan 200C/gas 7, without the fan running. Tip the soft cheese into the bowl of a stand mixer and beat until soft and pliable, or do this in a large bowl with a wooden spoon. Add the sugar and beat until fully mixed. Add the eggs, one at a time, beating well between each addition. In a separate bowl, stir together the soured cream and double cream. In another small bowl, mix together the cornflour and sea salt flakes, then stir this through the cream mixture. Tip this into the soft cheese mixture and beat well to combine.
STEP 2
Line a deep 20cm baking tin with a sheet of baking paper that’s large enough to line the base and come right up over the edges. Lay another large sheet of baking paper across the first, so it forms a cross and the tin is completely covered with paper. You want the paper coming over the top of the tin, as this will help you lift out the baked cheesecake at the end. It’s important that there are no holes in the paper lining, as this would cause the mix to leak and make a mess in the bottom of the oven.
STEP 3
Make sure the paper is securely in place, then pour the cheesecake mixture into the tin. Put the tin on a baking tray and put in the middle of the oven. Bake for 45-50 minutes or until the cheesecake is dark on top and puffed up. It might crack around the edge but this is fine. It should be wobbly in the middle.
STEP 4
Remove from the oven and serve warm, or cool completely before chilling in the fridge overnight (this will lend a perfectly creamy texture). The next day, cut and serve.
8- Layered mint chocolate mousse pots
Want to serve individual desserts to your dinner party guests? Try our creamy chocolate and peppermint pots for an impressive way to finish your meal.

Ingredients
WHITE CHOCOLATE MINT LAYERS
100g white chocolate, finely chopped
100ml double cream, plus extra to serve (optional)
3/4 tsp peppermint extract
a few drops green food colouring (gel pastes are best)
CHOCOLATE MOUSSE LAYERS
100g dark chocolate (65-70% cocoa solids), chopped
3 tbsp whole milk
2 large eggs, whites and yolks separated
60g caster sugar
200ml double cream
Method
STEP 1
Make the mint layers by putting the white chocolate in a bowl and the cream into a small pan. Over a medium heat bring the cream to a simmer then pour over the chocolate, along with the peppermint extract and the green colouring. Mix until smooth, then put aside for 30 minutes or until cooled slightly.
STEP 2
To make the chocolate mousse, put the dark chocolate in a heatproof bowl set over a pan of simmering water and heat, stirring occasionally, until melted. Remove the bowl from the heat and stir in the milk. Put aside to cool slightly.
STEP 3
Whisk the egg whites until foamy then slowly pour in the sugar while continuing to whisk until the mixture holds soft peaks. In a separate bowl, whisk the cream until soft peaks.
STEP 4
Mix the egg yolks into the cooled dark chocolate mixture then fold in the double cream followed by the egg whites.
STEP 5
To assemble, pour a little of the mint layer into the bottom of 6 small glasses (about 200ml) and swirl so it levels out. Put the glasses in the freezer for 10 minutes or until the layer is set. Top with 2 tbsp of the mousse mixture and carefully spread into an even layer. Freeze for 10 minutes as before.
STEP 6
Repeat this layering process until all the mousse is used. Refrigerate the finished desserts for a few hours or overnight until ready to serve. You can serve them as they are or with a little dollop of whipped cream, if you like.